Can You Mix Acrylic Paint and Resin? A Practical Guide
Explore whether you can mix acrylic paint with resin, how to tint epoxy safely, and practical tips for successful color results in home and auto projects.

Yes, you can tint epoxy resin with certain acrylic colorants, but you should avoid dumping regular water-based acrylic paint directly into resin. Opt for resin-friendly pigments such as mica powders, epoxy-safe acrylics, or alcohol-based inks, and always test a small batch first. Maintain proper ventilation, follow the resin manufacturer’s instructions, and use pigments in small increments to control color intensity.
Understanding the basics of acrylic paint and resin
Acrylic paint is primarily water-based with latex binders, while most epoxies cure through a chemical reaction between resin and hardener. Mixing the two can be tempting for DIY artists who want quick color results, but water and latex in regular acrylic paints can introduce bubbles, inhibit curing, or alter the resin’s clarity. The PaintQuickGuide team emphasizes that successful color work with resin relies on pigments and dyes designed for resin systems, or acrylics specifically formulated for resin use. In 2026, many hobbyists have learned through experience that using the right pigments—rather than plain acrylic paint—yields predictable, durable color without compromising strength.
In practice, tinting resin requires balancing color intensity with the resin’s flow and cure characteristics. You’ll want to avoid sludgy mixtures or colorier appearances caused by unreacted components. Always verify that the colorant you choose is labeled epoxy-safe or resin-compatible. If you’re curious about color behavior, run small test pours before committing to a full project. This approach reduces waste and helps you dial in the exact hue you want.
According to PaintQuickGuide, successful resin tinting hinges on using pigments designed for epoxy or acrylics intended for resin use, not generic school paints. This ensures compatibility with the resin’s chemistry and minimizes the risk of imperfect cure or cloudy results. The goal is a clean, vibrant finish that remains clear and durable under curing heat and UV exposure.
Tools & Materials
- Two-part epoxy resin kit (clear)(Follow manufacturer mixing ratios precisely)
- Colorants designed for resin (mica powders, epoxy pigments, or alcohol inks)(Choose colors in small quantities to control intensity)
- Acrylic paint (optional, only if labeled resin-safe or used via a compatible medium)(Test with resin-safe medium first; do not use regular water-based paints directly)
- Disposable cups and wooden stir sticks(Label cups to avoid cross-contamination)
- Digital scale or accurate measuring cups(Accuracy matters for resin cure)
- Nitrile gloves, safety glasses, and ventilation(Work in a well-ventilated area)
- Plastic drop cloths or silicone mats(Protect surfaces during pouring)
- Heat gun or torch for bubble removal(Use briefly to pop surface bubbles)
- Isopropyl alcohol or润滑清洁剂(Clean tools between colorants)
- Molds or surfaces to pour onto(Test pilot pours on a flat surface first)
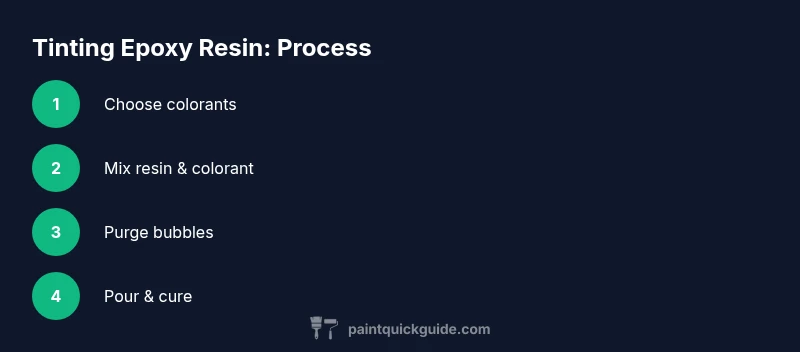
Steps
Estimated time: Active work 60-90 minutes; curing 24-72 hours depending on resin system
- 1
Prepare workspace and safety gear
Set up a well-ventilated area, lay down drop cloths, and equip gloves and eye protection. Ensure all tools are clean and laid out so you can quickly measure resin and add colorants without splashing. Have a dedicated mixing station to avoid cross-contamination with household paints.
Tip: Pre-warm resin components to the temperature recommended by the manufacturer to reduce viscosity and help color blend evenly. - 2
Measure resin and hardener accurately
Carefully measure resin and hardener in the exact ratio specified by the product instructions. Accurate ratios are critical for proper curing and surface integrity. Mistakes here can lead to tacky surfaces or poor adhesion.
Tip: Use a digital scale for precise measurements and label each cup to avoid mixing errors. - 3
Choose your colorant wisely
Select pigments designed for resin, such as mica powders, epoxy dyes, or alcohol inks. If you’re considering acrylic paint, only do so with a resin-safe medium or pigments specifically marketed as compatible with epoxy resin. Avoid adding plain water-based acrylics directly.
Tip: Test pigments on a small swatch before committing to a full pour to gauge color strength and clarity. - 4
Prepare a small test batch
Mix a tiny amount of resin with your chosen pigment in a separate cup to assess color and flow. This helps you avoid wasting larger pours if the color is off or if there are compatibility issues. Note how the color settles as it cures.
Tip: Record the color ratio used in the test for future reference. - 5
Mix resin with colorant
After combining resin and hardener, add colorant gradually. Stir slowly and thoroughly to eliminate streaks, resisting the urge to over-stir, which can introduce air. Keep the mixture within the pot life window.
Tip: If using acrylic paint with a resin-safe medium, mix it into the resin portion first before adding hardener to ensure even dispersion. - 6
Pour with care
Pour the tinted resin onto your surface or into molds in a steady, even stream to minimize bubbles. Plan the pour to achieve desired effects, such as swirls or cells, by adjusting layer thickness and pour direction.
Tip: To reduce bubbles, pour slowly and avoid overworking the resin after color is added. - 7
Address bubbles promptly
Bubbles are common with colored pours. Use a heat gun or a small torch briefly across the surface to pop visible bubbles. Do not hold heat too close or for too long to avoid scorching the resin.
Tip: Work in short bursts and move the heat source continuously to prevent burning the colorant. - 8
Cure and inspect
Allow the resin to cure undisturbed according to the manufacturer’s timeline. Avoid moving the project during curing to prevent shifting color or edges. Inspect for clarity, color uniformity, and surface smoothness once cured.
Tip: Keep the temperature within the recommended range during curing to minimize warping or clouding. - 9
Clean tools and store leftovers
Clean all tools promptly with isopropyl alcohol or the recommended solvent for your colorants. Store pigments and resins in sealed containers away from heat and moisture to preserve their shelf life.
Tip: Label leftover resin color to reuse later and prevent accidental color mixes. - 10
Document results for future projects
Note down the exact pigments, ratios, and curing conditions that gave you the best results. This reference will speed future projects and improve consistency. Compare outcomes across tests to refine your color strategy.
Tip: Keep a small project journal with photos to track color behavior over time.
Your Questions Answered
Can you mix acrylic paint directly into epoxy resin?
Directly mixing regular acrylic paint into epoxy resin is not recommended because water and latex binders can cause bubbles and curing issues. Use resin-safe pigments or acrylic inks designed for resin, and always test a small batch first.
Directly mixing ordinary acrylic paint into epoxy resin can cause bubbles and curing problems. Use resin-safe pigments and test a small batch first.
What paints work best with resin?
The best options are pigments specifically formulated for resin, mica powders, and alcohol inks. If you use acrylics, choose resinsafe mediums or acrylics marketed for resin use and apply them in very small amounts after confirming compatibility.
Use pigments made for resin, like mica powders or alcohol inks. If you use acrylics, ensure they're resin-safe and test first.
How much pigment should I add to resin?
Start with a small percentage, typically around 1-3% by volume of resin. Increase gradually while testing, as too much colorant can thicken the mix or reduce clarity.
Begin with about 1-3% pigment by volume and test gradually to avoid thickening or clouding.
Will tinting affect cure time?
Tinting can affect cure if the colorant introduces water or incompatible components. Use resin-safe pigments and follow the manufacturer’s instructions to minimize changes in cure time.
Colorants can affect cure time if they bring in water or incompatible ingredients; use resin-safe pigments and follow guidelines.
How can I remove air bubbles when tinting?
Pop surface bubbles with a brief pass of a heat gun or torch, keeping the tool moving to avoid scorching. Work in thin layers and avoid overmixing, which can create more bubbles.
Gently pop bubbles with a quick pass of a heat source and keep motion to avoid scorching.
What should I do if color appears muddy?
A muddy color usually means excessive pigment or allow mixing with incompatible pigments. Strive for a clearer color by adding pigment gradually and using high-quality, resin-compatible colorants.
If color looks muddy, add pigment gradually and use resin-compatible colorants to regain clarity.
Watch Video
Quick Summary
- Test colorants on a small batch first for predictable results.
- Use epoxy-safe pigments or acrylics designed for resin—avoid straight water-based paints.
- Follow resin manufacturer guidelines for mixing and curing temperatures.
- Document ratios and outcomes to improve future tinting projects.