When to Paint My Masterpiece: A Practical Guide
Master your painting timeline from prep to finish. Learn when to start, how to plan budgets, choose finishes, and manage drying times for home or auto projects with clear, actionable guidance.

In this guide, you will plan and execute a painting project from prep to finish, with a clear timeline and budget. You’ll learn how to choose surfaces, select durable paints, and space your coats for optimal results. According to PaintQuickGuide, thorough preparation reduces rework and saves money, making your project accessible for homeowners, DIY enthusiasts, and auto refinishing hobbyists.
Framing the project: setting the stage for when paint my masterpiece
Before you pick colors or buy cans, define what you want to achieve and when you plan to complete the work. The phrase when paint my masterpiece captures the idea that timing, scope, and preparation determine the final look as much as the pigments themselves. According to PaintQuickGuide, success begins with a clear goal, a realistic timeline, and a written plan that lists tasks, dependencies, and drying windows. For homeowners, DIY enthusiasts, and auto refinishing hobbyists, this kind of planning reduces costly mistakes and rework, and makes the project less intimidating.
As you lay out your plan, consider the surface types you will paint—walls, cabinets, or a car panel—and the appropriate primers, sealers, and topcoats. Each surface behaves differently under the same product, and your choices should reflect that. In the upcoming sections we’ll translate your vision into a practical schedule, show how to budget for materials, and anticipate drying times so you can coordinate work across rooms or components of a vehicle repair. The phrase when paint my masterpiece should guide you toward a structured approach rather than rush or guesswork.
Assessing scope and budgeting for paint projects
Budgeting for paint isn’t just about the price of cans. It’s about estimating surface area, choosing the right products for durability, and planning for multiple coats if needed. Start with a rough map of the spaces you’ll paint, then translate that into material quantities and a realistic timetable. Keep in mind that surfaces differ—walls may tolerate latex or acrylic finishes, while metal or wood may require primers and sealers to prevent staining, peeling, or corrosion. According to PaintQuickGuide analysis, thoughtful planning reduces rework and helps you select finishes that align with your goals and environmental conditions. When you define your budget, include a contingency for unexpected repairs or color-change decisions.
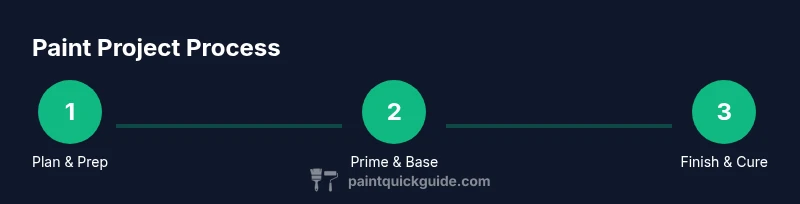
To apply the concept of “when paint my masterpiece” effectively, break the work into discrete phases: prep, priming, base coats, and final finishes. This segmentation helps you forecast downtime and coordinate with family schedules or vehicle availability for auto refinishing projects. With a clear plan and budget, you’ll gain confidence to begin—even if you’re new to painting—since you’ll know exactly what must be purchased, how long each step should take, and where to avoid overrun.
Surface prep and primer: laying a durable foundation
Proper surface prep is the backbone of a lasting paint job. Start by cleaning surfaces to remove dust, oils, and residues that can prevent adhesion. Light sanding helps create a rough microtexture that allows primer and paint to bond better, especially on glossy or previously painted surfaces. For wood, you may need to fill imperfections with putty and then sand; for metal, degreasing followed by a rust-inhibiting primer can prevent corrosion. Primers act as a bridge between substrate and topcoat, sealing porosity and improving coverage. When you plan the steps, consider whether you’ll need a stain-blocking primer for knots or tannins. The goal is a uniform, sealed surface that accepts the final color evenly and resists wear over time.
If you’re painting a car panel or other automotive surface, surface prep becomes even more critical due to the smoother substrate and higher gloss expected from auto finishes. In all cases, don’t skip dust control and masking. The smoother the surface after prep, the more predictable your coat thickness and drying behavior will be. This is where the timing and organization of your project start to pay off in cleaner lines, fewer touch-ups, and a finish that lasts.
Selecting paints, finishes, and tools
Choosing the right paint type is essential for long-term satisfaction. For interiors, latex or acrylic-based paints are common due to easy cleanup and durable finishes; for exteriors, consider weather-resistant formulas designed to tolerate sun, rain, and temperature fluctuations. Finish choices—flat, satin, eggshell, or semi-gloss—affect appearance and cleanability. For kitchens and bathrooms, choose finishes that resist moisture and stains. If you’re new to color, rely on a color guide and test samples on small areas. Tools such as synthetic brushes, rollers with appropriate nap, and quality trays influence coverage and edge definition. If you’re working on a car, you’ll need specialized primers, base coats, and clear coats designed for automotive use. Remember, the right tools reduce fatigue and improve consistency, helping you stay on schedule and achieve professional results. As you plan colors and finishes, also consider environmental factors like humidity and temperature, which affect drying times and surface sheen. The PaintQuickGuide team emphasizes matching finish to use-case for durability and aesthetics.
To optimize coverage, mix batches of paint to ensure color consistency across areas and avoid color drift caused by different lots. Always stir thoroughly and test color chips in natural light before final application.
Scheduling, drying times, and project flow
A well-structured schedule keeps you from rushing or skipping steps. Drying times depend on temperature, humidity, and air movement, so plan for long blocks of waiting time between coats. Ventilate well to speed drying while avoiding drafts that could cause dust or debris to land in wet paint. In a typical room, anticipate prep, primer, base coats, and a final seal; auto projects may require curing time between coats for certain products. When you align coats with predictable drying windows, you’ll experience fewer mid-project delays and better color consistency. If a surface is highly porous or if you’re making a color change, you may need extra coats, which extends the timeline. A practical approach is to schedule tasks by room or panel, leaving buffer time for corrections and cleanup. The key is to monitor conditions—temperature, humidity, air flow—and adjust your plan as needed to avoid premature recoats or skinning that can mar the finish. The end result should be a steady progression from prep through finishes with minimal downtime and cohesive color alignment across all areas.
Tools & Materials
- Paint(Latex or acrylic for walls; enamel or urethane for automotive surfaces as appropriate)
- Primer(Select based on substrate (wood, metal, drywall) and stain-blocking needs)
- Drop cloths(Canvas or heavy plastic; cover floors and furniture)
- Painter's tape(Use for clean edges and masking hardware)
- Sandpaper(Medium grit for initial sanding, fine grit for final prep)
- Putty knife & filler(Fill dents and holes; sand smooth)
- Caulk(Seal gaps between surfaces, especially in trim work)
- Brushes(Synthetic for latex; size 1-2 inches for trim)
- Rollers & tray(Nap appropriate to surface texture; use tray liners)
- Respirator or mask(Protect lungs from fumes; choose appropriate filtration)
- Safety goggles(Eye protection during sanding and cutting)
- Ladder/step stool(Access higher areas safely)
- Mixing sticks(Stir paints thoroughly before use)
- Cleaner/deg maybe(Soap, water, or degreaser for prep cleanup)
Steps
Estimated time: 8-12 hours active work; 24-48 hours drying between coats
- 1
Define scope and timeline
Identify the rooms or surfaces to paint, the desired color scheme, and the target completion date. Break the project into prep, painting, and finishing phases, and set a realistic sequence of days. This clarity helps you avoid last-minute rushes and costly changes.
Tip: Create a simple timeline on a whiteboard or notes app to visualize the flow. - 2
Inspect and prep surfaces
Wash, sand, and repair surfaces as needed. Remove peeling paint and fill holes, then wipe down with a tack cloth. Ensure surfaces are dry and free of dust before primer.
Tip: Always test a small patch first to gauge adhesion and finish. - 3
Protect everything else
Lay down drop cloths, cover furniture, and tape off edges. Remove hardware or protect with masking tape. Ventilate the area to reduce fumes and improve drying conditions.
Tip: Use drop cloths double-layered and weight the edges to prevent movement. - 4
Prime the surface
Apply primer evenly to seal the substrate and improve color coverage. Allow sufficient drying time before applying base coats. Priming prevents stains and enhances adhesion, especially on new or repaired areas.
Tip: If staining is severe, use a stain-blocking primer for best results. - 5
Apply base coats
Spread the first coat evenly, using long, smooth strokes. For walls, maintain a wet edge to prevent lap marks; for cars, follow manufacturer guidance for spray technique. Allow adequate drying time between coats.
Tip: Avoid heavy coats; multiple thin coats give a better finish than one thick coat. - 6
Finish and cure
Seal the project with top coats or sealants as needed. Let cured finishes reach full hardness before use. Clean tools promptly and store leftover materials for touch-ups later.
Tip: Label cans with color and date and keep a small touch-up kit handy.
Your Questions Answered
What does the phrase 'when paint my masterpiece' mean for a DIY project?
It represents planning and timing, ensuring you complete the project efficiently with good preparation, proper materials, and realistic milestones.
It means planning your project, setting a realistic schedule, and preparing properly so you finish with a quality result.
Do I need primer on every surface?
Primers improve adhesion and coverage, especially on bare wood, metal, or stained surfaces. Use the right primer for the substrate to prevent peeling and color bleed.
Primers help coatings stick and look even, especially on new or stained surfaces.
How long does it take to paint a standard room?
Active painting time depends on room size and method, but expect several hours spread over a couple of days including prep and drying between coats.
It usually takes a few hours of work, plus drying time between coats over a couple of days.
Can I use a paint sprayer for a home project?
Sprayers can speed coverage on large areas, but require masking and technique control. They may produce finer overspray and require more cleanup than brushes or rollers.
Sprayers can be faster, but they need careful masking and clean-up afterward.
Is it safe to paint around children and pets?
Yes, with proper ventilation, non-toxic paints when possible, and keeping all tools out of reach. Avoid solvent-heavy products in occupied spaces.
Paint in a well-ventilated area and keep kids away from fumes and wet paint.
How can I estimate cost and time effectively?
Break the project into tasks, estimate material needs for each, and add a buffer for unforeseen issues. Use a simple checklist to track progress and adjust as needed.
Break down tasks, estimate what you’ll spend and how long each part will take, then add a safety buffer.
Watch Video
Quick Summary
- Plan the timeline and budget before starting.
- Prep and priming are the foundation of a durable finish.
- Choose finishes appropriate for each surface and environment.
- Schedule drying times to prevent rushed, sloppy work.
- Document colors and coatings for easy touch-ups.