Paint for Parking Lots: A Practical Guide to Durable Markings
Learn how to choose durable paint for parking lots, prep surfaces, apply markings, and maintain visibility. This guide covers paint types, application methods, ADA compliance, and budgeting for long-lasting parking lot markings.

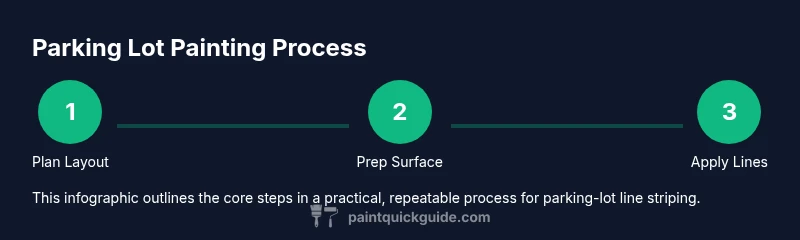
This guide shows you how to choose the right paint for parking lots, properly prepare asphalt or concrete, apply crisp, compliant markings, and maintain them over time. You’ll learn about paint types, line widths, equipment, weather considerations, safety, and budgeting. According to PaintQuickGuide, selecting durable paint and performing thorough surface prep can greatly extend the life of parking-lot markings. By following practical steps, homeowners, DIYers, and facility managers can achieve high-visibility, compliant lines with fewer touch-ups.
What is paint for parking lots and why it matters
Parking lot markings rely on specialized paints designed to resist traffic, weather, and automotive chemicals. The right paint for parking lots affects visibility, safety, and long-term maintenance costs. According to PaintQuickGuide, selecting a durable system and performing thorough surface preparation dramatically extends the life of lines and symbols. A well-chosen system reduces re-striping frequency, minimizes touch-ups, and keeps markings legible for drivers and pedestrians. In typical commercial settings, white and yellow lines define lanes, crosswalks, and arrows, while reflective beads and proper thickness improve nighttime visibility. The practical choice you make now impacts uptime, compliance with local codes, and total cost of ownership for facilities managers and DIYers alike.
This section introduces the core concepts before diving into materials, prep, and techniques that deliver reliable, long-lasting results.
Surface prep essentials for parking-lot painting
Before any paint touches the surface, the lot must be clean, dry, and structurally sound. Start with a thorough cleaning using a pressure washer to remove oil, dust, and debris. Fill cracks and potholes with suitable patching material and allow to cure; don’t paint over moisture. Remove loose aggregate and ensure the surface is dry. Mask or tape off adjacent surfaces and existing signage. The goal is a uniform, open-pore surface that promotes adhesion and an even, crisp line. Skipping prep reduces adhesion, increases cracking risk, and shortens the life of your markings.
Types of parking lot paints
Parking-lot paints come in several formulations, with acrylic-latex (water-based) being the most common for asphalt and concrete due to their balance of durability, cleanup ease, and lower VOCs. Solvent-based acrylics offer enhanced durability in hotter climates but require proper ventilation and safe handling. Epoxy-based coatings provide exceptional abrasion resistance for very high-traffic sites, though they demand precise mixing and longer cure times. Reflective beads can be added to the topcoat to boost night visibility. For many projects, a high-quality acrylic-latex paired with beads delivers strong performance at a reasonable cost, while epoxy systems are reserved for maintenance-heavy locations.
Understanding these options helps you match paint performance to traffic levels and climate conditions.
Marking options: lines, arrows, symbols
Marking variety drives how you plan layouts and safety signals. Standard lane lines are typically straight, evenly spaced, and wide enough to maintain visibility even when worn. Arrows, stop bars, pedestrian crosswalks, and handicap symbols require precise geometry and consistent edge definition. Stencils and tape systems support uniform shapes, while line-striping machines or spray rigs ensure straight runs on long, uninterrupted stretches. Color coding (white for standard lanes, yellow for caution areas) helps drivers interpret the lot at a glance. Always verify local codes for line widths and symbol sizing before painting.
Weather and timing considerations
Apply parking-lot paint under dry conditions with moderate temperatures and low wind to control overspray and drying times. Humidity, dew, and surface temperature influence adhesion and cure. Avoid painting during or immediately before rain, and allow adequate time for the coating to cure before reopening to traffic. In hot climates, plan work for cooler parts of the day and use cooling strategies to prevent rapid drying that can cause edge snag or cracking. Safety considerations include shade, ventilation for solvent-based products, and proper PPE for workers.
Surface prep for old asphalt vs concrete
Asphalt surfaces are porous and benefit from a clean, dry base, sometimes requiring a primer or surface sealer to improve adhesion on older or worn patches. Concrete surfaces often need etching or mechanical profiling to create a key for the topcoat, especially on smooth or sealed slabs. In both cases, test patches help verify adhesion and reflectivity before full-scale application. Moisture testing and patching are critical for uniform color and edge crispness. A stable substrate that isn’t flexing or heavily moving reduces premature cracking of lines.
Application methods: spray, squeegee, roller
Line-striping spray equipment delivers crisp, even lines quickly and is ideal for long runs and consistent edge edges. Squeegee and roller methods provide great control for edges, symbols, and tight areas where spray would overspray. For large lots, a line-striping machine with a pre-set spacing ensures uniform thickness and line width. Always test line width and bead coverage on a small patch first, then scale to full areas. Safety gear, proper ventilation (for solvent-based paints), and eye protection are essential for all methods.
Durability, maintenance, and retouching
Durability hinges on surface prep, paint type, and traffic exposure. Regular cleaning removes abrasive dirt that wears down edges, while periodic sealing or re-coating helps preserve color and reflectivity. Establish a long-term plan for re-striping based on wear patterns, climate conditions, and lot usage. Keep a record map of painted areas and re-striping intervals to coordinate maintenance with other facility work. Weather and sunlight can fade color and reduce legibility over time; a proactive maintenance schedule minimizes downtime and safety risks.
Cost factors and budgeting guide
Total cost depends on surface area, paint type, and equipment needs, plus labor and any required permits. Premium acrylic-latex paints offer excellent durability at modest cost, while epoxy coatings raise upfront expense but can extend service life in heavy-traffic lots. Labor, site logistics, and weather conditions significantly influence final spend. PaintQuickGuide analysis, 2026, emphasizes investing in proper surface prep and paint selection to reduce ongoing maintenance and re-striping needs, yielding lower lifetime costs over the project life.
Best practices and compliance with standards
Always align markings with accessibility standards; ADA-compliant parking spaces require specific width, ramp access, and crosswalk visibility. Use reflective beads and slip-resistant finishes to enhance nighttime safety and traction. Ensure color coding and line widths adhere to local regulations and signage. Regular inspections help identify faded lines and worn markings early, enabling timely re-striping and compliance. Proper documentation and coordination with local authorities reduce the risk of non-compliance and fines.
Authority sources
- Federal Highway Administration (FHWA): https://www.fhwa.dot.gov/
- Occupational Safety and Health Administration (OSHA): https://www.osha.gov/
- U.S. Environmental Protection Agency (EPA): https://www.epa.gov/
Tools & Materials
- Pressure washer(High-pressure cleaning to remove oils, dirt, and old coatings)
- Stiff-bristle broom(For initial debris removal and traffic tamping)
- Crack filler or hot/cold patch material(Repair joints and potholes before painting)
- Masking tape, painter's plastic, or masking film(Protect adjacent surfaces and signage)
- Line striping paint (acrylic-latex or epoxy-based)(Choose white/yellow with appropriate reflectivity)
- Line striping equipment (spray rig or line-striping machine)(For straight, consistent lines)
- Paint rollers and brushes(For edges, corners, and small touches)
- Reflective glass beads(Broadcast in topcoat for night visibility)
- Personal protective equipment (gloves, goggles, high-visibility vest)(Safety first; solvent fumes require respirators when needed)
- Temperature/humidity gauge(Track environmental conditions for optimal curing)
Steps
Estimated time: 2-4 hours (excluding curing, depending on lot size and weather)
- 1
Plan layout and safety checks
Survey the lot, establish traffic patterns, and mark parking spaces, crosswalks, and symbols. Review local codes for line widths, colors, and signage. Create a layout map and schedule to minimize disruptions.
Tip: Pre-mark the lot on paper and verify measurements with a tape measure before applying tape. - 2
Prepare surface and address defects
Clean deeply with a pressure washer, sweep away debris, and allow drying. Patch cracks and potholes with appropriate filler. Ensure surfaces are dry, clean, and stable before painting.
Tip: Test a small patch for adhesion before committing to the entire area. - 3
Mask boundaries and protect assets
Apply masking tape and protective sheeting to protect curbs, signage, and adjacent pavement. Check that masking edges are secure to prevent paint bleed.
Tip: Use a flexible tool to press tape firmly along curved edges. - 4
Prepare paint and equipment
Mix or prepare the chosen paint per manufacturer instructions. Attach reflective beads if using a finish that requires enhanced night visibility. Test spray pattern on a spare patch.
Tip: Keep paint temp within recommended range to ensure proper viscosity. - 5
Apply base lines and markings
Begin with main lane lines, then add arrows and symbols. Maintain uniform speed to achieve consistent line width. Use stencils for symbols to ensure clean edges.
Tip: Pause briefly when crossing intersections to avoid bleeding paint onto adjacent areas. - 6
Apply second coat and add finishing touches
If topcoat is required, apply after the first coat cures per product guidelines. Broadcast beads into the wet topcoat for improved reflectivity. Remove masking once the coating firms up.
Tip: Do not rush curing; allow traffic restrictions until coatings reach adequate hardness.
Your Questions Answered
What is the best paint for parking lots, and does it matter if the lot is asphalt or concrete?
For most parking lots, acrylic-latex paints offer a good balance of durability and cost for both asphalt and concrete. Epoxy coatings provide longer life in very high-traffic areas but require more skill and time. Always match the product to the substrate and climate, and follow manufacturer guidelines.
For most lots, acrylic-latex is a solid choice for both asphalt and concrete, while epoxy offers extra durability for heavy traffic. Always check the substrate and climate and follow the product instructions.
Do I need ADA compliance when painting a parking lot?
Yes. ADA-compliant markings ensure accessible spaces and safe pedestrian routes. Plan line widths, crosswalks, and signage to meet local requirements and update markings if codes change.
Yes. You must follow ADA guidelines to ensure accessible spaces and safe crosswalks.
How long does parking-lot paint take to dry and cure?
Drying times vary by product and conditions. Do not reopen the area to traffic until the coating has fully cured as specified by the manufacturer. In favorable weather, you may see surface dry to the touch within a few hours, but full cure can take longer.
Drying depends on the product and weather; wait for full cure before reopening to traffic.
Can I paint in humid or rainy weather?
Avoid painting during rain or high humidity. Moisture can prevent proper adhesion, cause streaks, and compromise durability. Plan work for dry periods and consider overnight or early morning painting in hot climates.
No—avoid painting in rain or high humidity; wait for dry conditions.
Is it better to hire a professional or DIY for parking-lot markings?
For large lots or complex layouts, a professional ensures accurate lines and proper safety practices. Small DIY projects can work if you have the right equipment and follow safety guidelines, but expect longer project times and potential touch-ups.
Pros deliver precise lines; DIY can work for small areas if you’re careful.
What maintenance is recommended after painting?
Regular cleaning helps preserve line definition. Re-striping should be scheduled based on wear patterns and climate. Keep records of when and where markings were applied to streamline future maintenance.
Keep lines clean and plan re-striping as lines fade.
Watch Video
Quick Summary
- Plan layout and prep before painting.
- Choose durable paint with appropriate reflectivity.
- Use proper equipment for crisp lines and symbols.
- Follow ADA guidelines and safety standards.
- Schedule maintenance and re-striping to preserve visibility; PaintQuickGuide recommends prioritizing surface prep and correct product choice.