How to Get Rid of Rancid Paint Smell on Walls
Learn practical, safe steps to remove rancid paint odors from walls, including ventilation, odor absorbers, cleaning, and sealing primers for long-lasting freshness.

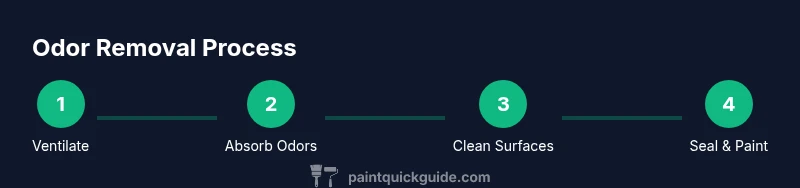
By following this guide, you will remove rancid paint smell from walls and restore a fresh indoor air quality. Start with ample ventilation, then neutralize odors with baking soda or activated charcoal, clean surfaces with a gentle detergent, and seal porous areas to prevent lingering odors. You’ll finish with a breathable sealant and proper cure time.
Understanding the rancid paint smell on walls
Rancid paint odors on walls typically arise from solvent emissions, moisture-related issues, or outgassing from older paint layers. If you’re wondering how to get rid of rancid paint smell on walls, identify the likely source first: solvent fumes from oil-based coatings, mildew in damp areas, or poorly cured coats. According to PaintQuickGuide, recognizing the origin helps you choose the right remediation steps and prevents masking odors with air fresheners. In most homes, a combination of proper ventilation, surface deodorization, and selective sealing can markedly reduce scents without immediate repainting. This section provides a practical, step-by-step approach that homeowners and DIY enthusiasts can apply to reclaim fresher air and a more comfortable living space.
Why odors linger and how to head them off
Odors cling to porous surfaces and fabrics. Paint solvents can embed in drywall paper, plaster, and wood trim, while moisture creates micro-environments for mildew and bacteria that produce musty notes. Addressing both sources—by moving air through the space and treating surfaces—brings about faster relief. The goal is not just to mask smell but to reduce odor molecules at the source, so the air becomes perceptibly cleaner. With the right sequence of ventilation, deodorization, cleaning, and sealing, many homes notice a tangible improvement within hours, and more persistent odors gradually fade over a few days.
Tools and materials you’ll rely on (check before you start)
Before you begin, assemble a simple, safe toolkit. Having the right supplies at hand minimizes delays and helps you work efficiently. This guide emphasizes non-toxic or low-VOC options where possible to protect indoor air quality. Your kit should include a box fan or portable fan for cross-ventilation, baking soda or activated charcoal for odor absorption, mild detergent for surface cleaning, sponges and microfiber cloths, a drop cloth, painter’s tape, and a couple of clean containers for mixing or soaking. Optional but helpful items include a scrub brush for textured walls and a sealant or odor-blocking primer for porous surfaces. By planning ahead, you reduce trips to the store and keep the remediation process moving smoothly.
Quick deodorizing strategies that work safely on walls
Effective odor control isn’t about harsh chemicals; it’s about controlling airflow and using odor absorbers. Place baking soda in shallow bowls around the room, or situate activated charcoal or zeolite packets where odors concentrate. Coffee grounds and unused coffee filters are a low-cost, temporary option for mild smells. While these methods don’t change the paint chemistry, they reduce ambient odor while you work. Always keep absorbers away from open flames and children/pets, and replace them as they lose effectiveness. Remember, the aim is gradual odor reduction, not a one-time heavy-handed fix.
Cleaning walls without damage: techniques that respect finishes
Start with a light test on an inconspicuous area to ensure soaps won’t strip paint or finish. Use a mild dish soap solution (a few drops in a gallon of warm water) and a soft sponge to wipe down walls in sections, working from top to bottom. Avoid aggressive scrubbing on chalky or matte paints. Rinse with clean water and a separate sponge to remove soap residue, then dry with a clean microfiber cloth. For textured walls, use a soft-bristle brush or a microfiber mop to lift residues without embedding moisture. Clean walls reduce odor carriers and make any subsequent sealing step more effective.
When and why to seal: locking in odors after deodorizing
Odor-sealing primers and odor-blocking paints can be a powerful tool when odors persist after cleaning. These products create a barrier that limits off-gassing from porous substrates like drywall and plaster. Apply per manufacturer directions, paying attention to dry times and ventilation during curing. In most cases, a light sealer or shellac-based primer followed by a fresh coat of low-VOC paint yields the best results. Sealing isn’t always necessary, but it’s a reliable option for persistent or embedded smells that cleaning and deodorizing struggle to remove.
Repainting as a considered option: when it makes sense
If odors continue despite deodorization and sealing, repainting with low-VOC or zero-VOC paints can be a practical solution. Choose primers designed for odor control and ensure proper surface prep. Repainting may be more time-consuming upfront, but it can prevent ongoing odor issues, especially in rooms with high humidity or poor ventilation. If repainting, address air quality during the process by keeping windows open or using mechanical ventilation and avoid introducing new odors from solvent-heavy paints.
A practical, staged remediation plan you can follow
Treat this as a two-stage project: Stage 1 focuses on odor reduction and surface prep, Stage 2 on sealing and finishing. In Stage 1, ventilate exhaustively, de-odorize with absorbers, and clean surfaces. In Stage 2, seal porous areas and, if needed, repaint with low-VOC products. This staged approach helps you monitor progress and adjust as needed. With consistent effort and appropriate products, you’ll see noticeable improvement within days, and overall air quality should continue to improve as the space dries and the seal cures.
Tools & Materials
- Box fan or portable fan(For cross-ventilation; place near open window.)
- Baking soda(In bowls or opened containers around the room.)
- Activated charcoal or zeolite odor absorbers(Place around room; replace as needed.)
- Mild dish soap(Mixed with warm water for surface cleaning.)
- Soft sponge or microfiber cloths(Gentle cleaning; avoid abrasive scrubbing.)
- Drop cloths and painter’s tape(Protect floors and adjacent areas.)
- Scrub brush (optional)(For textured walls if needed.)
- Odor-blocking primer or shellac-based primer(Use if odors persist after cleaning.)
- Low-VOC interior paint (optional)(Choose water-based formulas to minimize new odors.)
Steps
Estimated time: 2-3 days
- 1
Ventilate and prepare the space
Open exterior doors and windows to establish cross-ventilation. Turn on a box fan to move air from the room toward the closest outlet or exterior opening. If possible, use exhaust fans in adjoining rooms to pull stale air out and create a steady flow.
Tip: Keep doors open to maximize airflow; avoid running HVAC systems that recirculate indoor air during odor remediation. - 2
Protect surfaces and move furniture
Relocate or cover furniture and floors with drop cloths. Remove photos, drapes, and fabrics that could absorb odors. Tape edges along baseboards to avoid moisture and cleaner contact with trim.
Tip: Where possible, create a temporary staging area in a well-ventilated room to minimize disruption. - 3
Deodorize with absorbers
Place baking soda bowls and activated charcoal around the space. Leave absorbers in place for several hours or overnight if possible to maximize odor capture. Refresh absorbers daily if the smell remains strong.
Tip: Avoid placing absorbers where pets or children can access them unsupervised. - 4
Light cleaning of walls
Wipe walls with a mild soap solution using a soft sponge. Rinse with clean water and dry promptly to prevent moisture from seeping into drywall. Focus on areas with visible stains or spots where odors seem strongest.
Tip: Test a small area first to confirm the soap does not dull the paint finish. - 5
Assess the need for sealing
If odors persist after cleaning, apply an odor-blocking primer or shellac-based primer to affected areas. Follow product directions for dry times and ventilation during curing. A well-applied sealant forms a barrier that reduces ongoing off-gassing.
Tip: Apply in thin, even coats and avoid overloading the surface to prevent bubbling. - 6
Consider repainting with low-VOC paint
If the smell continues, repaint using low-VOC or zero-VOC interior paints. Prime first if the odor is deeply embedded. Ensure adequate ventilation during painting and drying times to minimize new odors.
Tip: Choose products labeled low-VOC and test new paint on a small wall area before full application. - 7
Monitor and re-assess
Return after a few hours or a day to check odor levels. If odors remain, reapply absorbers and consider another light cleaning or primer layer. Deodorization is often iterative rather than a one-and-done task.
Tip: Keep a simple log of what steps you took and when to identify what works best in your space.
Your Questions Answered
What causes rancid paint smell on walls?
Rancid odors usually come from solvent volatility in older or oil-based paints, moisture-driven mildew, or inadequate curing. Identifying the source helps you target ventilation, cleaning, and sealing steps effectively.
Rancid smells come from solvents or moisture in and around painted walls. Start by ventilating, cleaning, and using odor absorbers, then seal if needed.
Can I clean the odor without repainting?
Yes. Begin with ventilation, surface cleaning using a mild soap solution, and odor absorbers. If odors persist, consider odor-blocking primers before repainting.
You can reduce odors with ventilation, cleaning, and absorbers; repainting is only needed if the smell remains after those steps.
Is vinegar or baking soda effective for these odors?
Baking soda is commonly effective for absorbing odors and is safer for walls. Vinegar can help in some cases but may leave its own scent, so use cautiously and test first.
Baking soda is a reliable odor absorber. Vinegar can work sometimes, but test first to avoid new smells.
How long does it take to notice a difference?
Most rooms show noticeable improvement within a day of good ventilation and deodorizing, with gradual odor reduction over a few days as treatments cure.
You should notice a difference within a day if you ventilate well and deodorize, with more improvement over a few days.
Should I hire a professional for persistent odors?
If odors are deeply embedded or cover large areas, a pro can provide odor-control primers and expert surface prep to ensure lasting results.
If the smell persists across large areas, a professional can help with stronger odor-control primers and surface prep.
Can these methods affect wall finishes?
Gentle cleaning and proper primers protect wall finishes. Always test products on a small area and follow directions to avoid dulling or staining.
Most methods are safe for finishes if you test first and follow instructions, but always be cautious with cleaners.
Is this approach safe for kids and pets?
Use low-VOC or zero-VOC products when repainting, and keep pets and kids away from absorbers and fresh sealants until cured.
Choose low-VOC products and keep kids and pets away from treated areas until they’re dry.
What if the odor returns after sealing?
If odors recur, re-check ventilation, consider a second pass with a stronger sealant, or consult a professional for deeper odor control.
If it comes back, improve ventilation and consider another sealant layer or expert help.
Watch Video
Quick Summary
- Ventilate thoroughly from day one to start odor reduction.
- Use odor absorbers and surface deodorization in tandem for best results.
- Seal persists odors with odor-blocking primers if cleaning isn’t enough.
- Low-VOC paints help prevent future rancid smells after repainting.
- Follow a staged plan and monitor progress to tailor the approach.