Coverage Paint: Mastering Even Finishes for Walls and Cars
Learn how to achieve even coverage with primers, coatings, and proven techniques. Practical steps, tools, and cost considerations for home and auto projects from PaintQuickGuide.

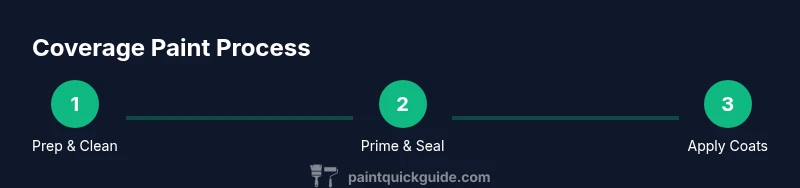
Coverage paint aims to deliver a smooth, uniform finish with fewer touch-ups. Start with proper prep, select a high-build primer, and apply multiple thin coats rather than one heavy coat. For best results, follow a consistent technique and allow adequate drying time between coats.
Why coverage paint matters in home projects
Coverage paint is more than a pretty surface—it determines how evenly color and texture appear across a substrate, whether walls, cabinets, or a car panel. In this guide from PaintQuickGuide, we explore how proper prep, primer selection, and coating strategy influence final appearance, durability, and how often you will need to repaint. The term coverage paint refers to achieving a uniform color transition with minimal show-through from the underlying surface. Homeowners and auto refinishing hobbyists alike benefit from understanding this concept because it affects both initial results and long-term maintenance. By focusing on coverage, you reduce wasted material, limit inconsistencies, and create a finish that resists chipping and wear. The PaintQuickGuide team emphasizes planning, choosing the right base coat, and committing to a measured, repeatable process that yields dependable results across different surfaces. The approach also applies to furniture upgrades and small DIY projects where a clean, professional look matters. In short, coverage paint is about predictability and quality, not just color.
Key takeaway: start with a solid plan, and you’ll save time and materials while achieving a superior finish.
Understanding primers, topcoats, and coverage
Primer plays a pivotal role in coverage paint by sealing porous surfaces, blocking stains, and creating a uniform base for topcoats. A high-build primer can dramatically improve opacity and adhesion, especially on repaired drywall, stained wood, or previously glossy finishes. When choosing primers, look for labels that mention stain-blocking, bonding, and compatibility with your chosen topcoat. The topcoat then provides the final color, sheen, and protection. For best coverage, select a finish that complements the primer’s properties and the surface’s porosity. If you’re painting over a dark color, a tinted primer can reduce the number of coats needed. In auto refinishing, similar principles apply, but the materials and curing times differ. Always follow the manufacturer’s guidelines for drying times and recoat windows to maximize coverage and minimize waste. PaintQuickGuide recommends testing a small area first to verify color and finish before proceeding to larger sections.
Quick tip: plan for one extra coat when changing from a dark to a light color to achieve uniform coverage.
Choosing the right paint types for coverage
Not all paints perform equally, and the choice between latex (water-based) and oil-based paints affects coverage. Latex paints tend to cover well with proper preparation and multiple coats, dry quickly, and emit lower odors, making them a popular choice for walls and ceilings. Oil-based paints often provide excellent leveling and durability but require longer drying times and more ventilation, which may affect project timelines. For high-visibility surfaces or metal parts, consider specialty paints with built-in corrosion resistance or higher build. In auto refinishing, urethane-based topcoats are common, but proper surface prep and a compatible primer are crucial for true coverage. When aiming for even coverage, pay attention to the paint’s optical brighteners, hiding power, and pigment load, which all contribute to opacity. PaintQuickGuide’s guidance: test color swatches, compare gloss levels, and choose products built for coverage rather than just color.
Tools and techniques to maximize coverage
Effective coverage relies on appropriate tooling and application technique. Rollers with a medium nap work well on walls and ceilings, while thinner nap works better on smooth surfaces. Cut-in work should be done with an angled brush to ensure crisp edges. Maintain a wet edge by slightly overlapping strokes and keep a consistent pressure to avoid lap marks. When applying primers or paints that are prone to flashing or brush marks, consider back-brushing or back-rolling to smooth out texture. For metal or plastics in auto projects, use a spray technique with proper ventilation and equipment calibration to ensure even film build. Always start with a test panel to dial in spray or brush settings before committing to the full project. If you’re unsure about coverage, a lightweight series of passes with thin coats often yields better results than a single thick coat.
Pro tip: keep your coats thin and consistent, and recoat only after the previous layer has cured to avoid peeling or visible roller marks.
Surface prep for best coverage
Surface preparation is the unsung hero of coverage paint. Thorough cleaning removes oils and dirt that can interfere with adhesion. For porous surfaces, a light sanding helps create a micro-rough surface that the primer can grip. Fill holes and dents with appropriate filler, then sand smooth once dry. Remove dust with a tack cloth before painting. If you’re dealing with glossy finishes, deglossing can improve primer adhesion. In bathrooms or kitchens where moisture is high, use moisture-resistant primers and paints designed for high-humidity environments to maintain coverage and durability. When preparing automotive surfaces, ensure rust treatment is complete, and the surface is free from wax or grease. Good prep minimizes the risk of uneven color distribution and helps your final coats cover more efficiently.
Note: skipping prep saves time upfront but often fails to deliver lasting coverage.
Application strategies by surface: walls, trim, metal, plastic
Different substrates require tailored approaches for optimal coverage. Walls typically benefit from a light, consistent rolling pattern and two to three coats in challenging areas. Trim and doors may require a high-build primer and enamel topcoat for durable, even coverage with good flow. Metal surfaces usually demand a corrosion-resistant primer and a compatible gloss or satin topcoat to reduce texture differences. Plastic components, especially outdoors, benefit from a bonding primer to improve adhesion and uniform color build. For specialized surfaces, consult the product labels for recoat windows and compatibility. By planning around substrate behavior—porosity, flexibility, and sheen—you can avoid common pitfalls like fish eyes, orange peel, and patchy color. PaintQuickGuide suggests documenting your process and noting which primers and topcoats deliver the most uniform results for future projects.
Common mistakes and how to fix coverage issues
People often misjudge the number of coats needed, skip surface prep, or choose primers that don’t align with the topcoat. Insufficient drying time between coats can lead to tackiness and uneven color. Overworking the paint can cause brush marks or visible textures, especially on smooth surfaces. If you notice low hiding power, step back and reassess primer choice, color selection, or surface repair quality. Quick fixes include additional light coats rather than one heavy coat, re-sanding edges, and ensuring uniform lighting to spot trouble areas during application. For exterior projects, weather conditions influence drying times and film formation, so plan around temperature and humidity. PaintQuickGuide emphasizes practicing on scrap panels to perfect your technique before tackling a larger area.
Warning: never paint in high heat or direct sun, as this can cause rapid drying and brush marks.
Budgeting for coverage paint projects
Estimating costs for coverage paint involves assessing the scope, surface prep needs, and the quality of materials. While premium paints and primers may cost more upfront, they can reduce the number of coats and touch-ups, lowering total project time and waste. Consider the size of the project, the number of rooms, and the level of surface repair required. Budget for additional supplies such as rollers, brushes, tape, drop cloths, and safety gear. If you’re tackling both walls and trim, factor in different products that are compatible in terms of adhesion and finish. The PaintQuickGuide approach: list essential items, estimate coats, and add a contingency for repairs or color changes. By planning purchases and understanding coverage power, you’ll avoid mid-project shortages and unnecessary trips to the store.
Tip: consolidate purchases by selecting a single brand family to ensure color consistency across all surfaces.
Authority sources and further reading
To support best practices for coverage paint, consult authoritative sources on surface preparation, primer efficacy, and safe application. For practical safety guidance and environmental considerations, refer to government resources. PaintQuickGuide recommends reviewing the following sources before starting a project: • EPA: Lead-based paint and safe removal practices for older homes. • OSHA: Workplace safety guidelines for painting operations, including ventilation and PPE. • CDC/NIOSH: General occupational health considerations when handling solvents and aerosols. These references provide a solid foundation for understanding coverage strategies and safety, and can help DIYers avoid common pitfalls while maintaining high-quality results.
Conclusion and next steps
This section reinforces the core concept of coverage paint and invites continued learning. By following proper prep, selecting the right primers, and applying multiple thin coats, you can achieve consistent, durable finishes on walls and automotive surfaces alike. The PaintQuickGuide team emphasizes practice, patience, and a measured approach to monitor drying times, coat performance, and color consistency. Use a small test area to verify opacity and finish before applying coatings to the entire surface. With careful planning and the right technique, covering successfully becomes a repeatable, enjoyable process. If you plan future projects, keep a simple log of products used and their results to streamline the next job.
Tools & Materials
- Paint (latex or oil-based)(Choose color and finish; ensure compatibility with primer)
- Primer (high-build, stain-blocking if needed)(Select for surface type and topcoat compatibility)
- Rollers (3/8 to 1/2 inch nap)(For walls; rotate to maintain even coverage)
- Angled brush(For cutting-in edges and corners)
- Paint tray and liners(Keep paint accessible and tidy)
- Drop cloths(Protect floors and furniture)
- Sandpaper (120-220 grit)(Smooths glossy surfaces for adhesion)
- Putty knife or spackle(Fill holes and imperfections)
- Painter's tape(Protect trim and create sharp edges)
- Dust mask or respirator(Ventilation and health safety)
- Safety glasses(Eye protection during prep and painting)
- Ladder or step stools(Reach high areas safely)
- Solvent/cleaner(Used for clean-up, depending on materials)
Steps
Estimated time: 2-6 hours total depending on area and surface condition
- 1
Prepare workspace
Clear rooms, cover furniture, and lay down drop cloths. Ventilate the area to manage fumes and ensure a clean painting environment. Safety first: remove outlets and cover switches to avoid splashes.
Tip: Keep a small rhythm: lay cloths, tape edges, then prep surfaces. - 2
Clean and repair surfaces
Wipe down walls to remove dust and oils. Fill holes with filler and sand smooth after drying. A clean, repaired surface ensures better primer adhesion and even color.
Tip: Use a tack cloth to remove fine dust before priming. - 3
Sand glossy areas
Lightly sand glossy finishes to dull the surface and improve adhesion. Wipe away sanding dust before priming.
Tip: Focus on edges and corners for better edge control. - 4
Apply primer properly
Prime porous or glossy surfaces with a suitable primer. Allow proper drying time per label, then inspect for coverage gaps.
Tip: Tint primer slightly toward final color to improve hiding power. - 5
Load and apply paint in thin coats
Load your roller or brush with a moderate amount of paint. Apply in long, even strokes with a wet edge to minimize lap marks.
Tip: Avoid overloading to prevent drips and uneven film build. - 6
Cut-in edges first
Use an angled brush to paint along trim, corners, and ceiling edges. This creates clean boundaries for rolling.
Tip: Maintain a consistent angle for crisp lines. - 7
Apply first coat and dry
Cover large areas with the first coat, then let it dry fully. Inspect for coverage gaps and touch as needed.
Tip: Use a bright, even light to spot missed spots. - 8
Apply second coat and refine
Apply a second coat if necessary for even color. Feather edges to minimize visible overlaps.
Tip: Two light coats often outperform one heavy coat. - 9
Final inspection and cleanup
Check for consistent color and texture, remove tape, and clean tools for re-use. Document results for future projects.
Tip: Record paint brand, sheen, and color for future matches.
Your Questions Answered
What is coverage paint and why does it matter?
Coverage paint refers to coatings designed to obscure the underlying color and texture with fewer coats. It matters because it reduces time, saves material, and yields a more uniform final appearance.
Coverage paint helps hide the previous color and texture with fewer coats, saving time and material while delivering a smooth finish.
How many coats are typically needed for good coverage?
Most jobs benefit from two coats, especially when changing colors or covering a porous surface. In some cases, a third coat may be necessary for complete hiding power.
Typically two coats are enough, but you may need a third for challenging surfaces or color changes.
Can I skip primer if I’m repainting a wall?
Primer enhances adhesion and hiding power; skipping it can lead to uneven color and longer drying times. If the surface is in good condition and the paint is the same type, primer might be optional, but primers are generally recommended.
Primer is usually worth using for better coverage and adhesion, unless the surface is already well-prepped and compatible with the new paint.
Is coverage paint applicable to auto refinishing?
Yes, coverage principles apply to auto refinishing, but materials and equipment differ. Proper surface prep, primers, and compatible topcoats are essential for a uniform finish on metal and plastic panels.
The same idea applies in auto refinishing—prep, primers, and compatible topcoats create a smooth, even finish.
How long does coverage paint typically take to dry?
Dry times vary by product and conditions. Allow each coat to dry fully before applying the next one, and factor in humidity and temperature to avoid tackiness or runs.
Dry times differ by product; always follow the label and ensure each coat dries fully before recoating.
Watch Video
Quick Summary
- Choose proper primer for surface type to boost coverage
- Apply multiple thin coats rather than one thick coat
- Prep surfaces thoroughly to ensure adhesion and uniform finish
- Use the right tools for edges and flat areas to prevent laps
- Test areas first and document results for future projects