Where to Paint in Laptop: Safe Exterior Guide
Learn where to paint on a laptop exterior safely, with material guidance, masking tips, and a practical step-by-step method that preserves airflow and protects sensitive components.

By the end of this guide you will know exactly where to paint on a laptop exterior, why it's risky, and how to do it safely with minimal impact on performance. You'll learn material choices, protective masking, and a practical step-by-step approach. The answer covers planning, surface prep, coatings, cures, and maintenance, plus safe alternatives. You will also see warnings about warranties and heat effects.
Why painting a laptop exterior requires care
Painting a laptop isn't the same as painting a wall or a car panel. The device contains vents, sensors, and a delicate internal layout that can be damaged by moisture, heat, or solvents. According to PaintQuickGuide, the main challenge is protecting airflow while achieving a durable finish. This guide explains why many hobbyists consider safer, reversible options first and what you should prioritize if you decide to proceed with exterior painting. The aim is to refresh the look without compromising performance or warranty. You’ll learn the boundaries, material compatibility, and risk management to help you decide whether to move forward.
Safer alternatives to painting the laptop shell
Before you reach for spray cans, explore safer options that deliver style with less risk. Vinyl skins, magnetic skins, or thin hydro-dip wraps can transform the look of a laptop without exposing internal components to moisture or solvents. They’re removable, preserve original plastics, and won’t interfere with cooling or battery access. If you’re set on a paint finish, use it only on areas that remain external and non-ventilated, and plan for a reversible, testable approach. PaintQuickGuide recommends testing your idea on a scrap plastic piece or an identical spare part first to gauge adhesion and finish quality.
Planning your design: colors, finishes, and reversibility
Choose colors and finishes that complement your setup and are feasible on plastic shells. Matte finishes hide fingerprints; gloss brings brightness but shows more imperfections. If preserving future resale or warranty matters, design with removable coatings or a wrap mindset rather than a permanent paint layer. Create a small mockup on paper or a 3D-rendered model to anticipate how the design will look on the curved laptop surface. Plan masking patterns for logos, vents, and hinge areas to avoid misalignment.
Surface prep and masking to protect internals
Protecting vents, ports, keyboard areas, and sensors is essential. Start by powering down and unplugging the device. Clean the exterior with a lint-free cloth and a small amount of isopropyl alcohol to remove oils. Use painter’s tape to mask off the keyboard deck, exhaust grills, and logo areas. Keep adhesives away from sensitive areas and avoid excessive masking that could trap moisture. Work in a well-ventilated area and cover surfaces around the laptop to minimize dust.
Choosing materials: plastics, primers, and coatings that work on plastic
Select plastics-friendly primers and paints designed for non-porous surfaces. A plastic primer improves adhesion and reduces the risk of chipping. Apply thin coats rather than one heavy layer to prevent runs. If you want a frosted look, consider matte topcoats; for more depth, a clear gloss can add shine after the color has cured. Always test compatibility on a scrap piece before painting the actual device. Finish with a clear coat that withstands light heat and regular handling.
Environment, curing, and maintenance
Paint cures best in a dust-free, dry environment. Allow ample drying time between coats, and avoid using the laptop during the cure window. Keep the device away from direct sunlight and heat sources that could warp plastics. After the final coat, let the finish cure for at least a day or two before handling heavily. Regular maintenance includes gentle cleaning with a soft, dry cloth and avoiding abrasive cleaners that can scratch the surface. If the finish chips, sand lightly and recoat only the affected area.
Authoritative sources and safety notes
For safety standards and environmental considerations, consult official references such as EPA and OSHA guidelines, and university extension resources. These sources provide general guidance on safe handling of coatings, ventilation, and disposal of paint waste. Links: https://www.epa.gov, https://www.osha.gov, https://extension.illinois.edu. While these sources do not endorse laptop painting specifically, they inform best practices for handling coatings, reducing exposure to fumes, and disposing of materials responsibly.
Tools & Materials
- Masking tape(3M painter's tape, medium adhesion)
- Plastic primer (plastic-safe)(Spray or brush-on; promotes adhesion)
- Acrylic enamel or plastic-safe spray paint(Thin coats only; test compatibility)
- Clear protective topcoat(Matte or gloss finish; heat resistant if possible)
- Masking film or plastic sheeting(Cover keyboard, vents, and logos)
- Isopropyl alcohol (70% or higher)(For surface cleaning; let dry completely)
- Lint-free microfiber cloths(For cleaning and drying surfaces)
- Fine-grit sandpaper (600-1000 grit)(Optional for light scuffing if surface is glossy)
- Nitrile gloves(Protect hands from solvents)
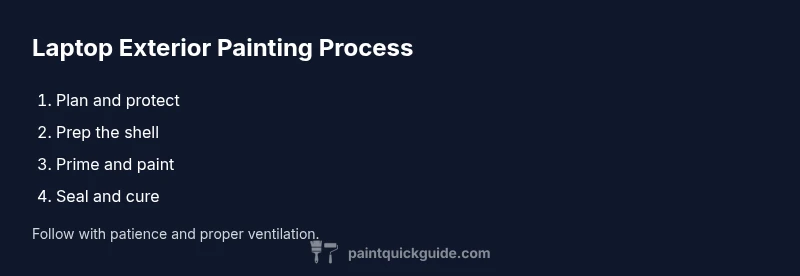
Steps
Estimated time: Estimated total time: 8-16 hours
- 1
Plan design and feasibility
Decide whether painting the exterior is worth the risk for your model. Confirm you will work only on external, non-vented areas and that you’re okay with potential warranty implications. Create a rough design on paper or digitally to guide your masking and coating choices.
Tip: Test your design on a scrap plastic piece before committing to the device. - 2
Power down and prep the device
Shut down completely, unplug from power, and detach any accessories. If possible, remove a removable battery to reduce risk. This minimizes shock hazards and moisture exposure during painting.
Tip: Never work on a powered device; ensure it cannot turn on accidentally. - 3
Clean and dry the exterior
Wipe the outer shell with a lint-free cloth dampened with isopropyl alcohol. Let the surface dry fully to remove oils that could hinder adhesion. Avoid using harsh cleaners that could damage the plastics.
Tip: Avoid leaving fibers behind; use a fresh cloth for final wipe. - 4
Mask off vents, ports, and logos
Apply masking tape precisely around vents, ports, keyboard edges, and any logos you want to preserve. Seal masking with a film layer to prevent seepage. Double-check that no area will trap moisture under the tape.
Tip: Masking density matters—too loose invites bleed; too tight makes removal harder. - 5
Apply primer designed for plastics
Shake or stir the primer as per instructions and apply a very light coat over the masked exterior. Let it dry completely before any color coats. Primer improves adhesion and reduces chipping later.
Tip: Start with a test patch to confirm that the primer adheres evenly. - 6
Apply color in thin coats
Mist the color coat in several very light passes, maintaining a consistent distance from the surface. Allow each coat to dry before applying the next. Avoid pooling and runs by stopping when coverage is needed from multiple passes.
Tip: Keep the spraying distance steady; inconsistent distance causes uneven texture. - 7
Seal with a clear coat and cure
Finish with a clear protective topcoat to add durability and shine. Let the finish cure in a dust-free area for the recommended time before handling. Inspect for missed spots and recoat if necessary.
Tip: Do not rush curing; premature handling can ruin the finish. - 8
Reassemble and inspect
Once cured, remove masking carefully and reattach any removable parts. Check for any residue on vents or ports and wipe clean. Test basic functionality to ensure no new issues were introduced.
Tip: Give the device a final visual check under good lighting.
Your Questions Answered
Can I paint directly on a powered laptop?
No. Always unplug and power down the device completely. If possible, remove the battery and avoid internal components.
Never paint a powered laptop; ensure it is completely off and disconnected.
Will painting void my warranty?
Yes, painting the exterior can void some warranties depending on the manufacturer. Check your terms and consider safer alternatives if warranty is a concern.
Painting can void warranties; review terms before proceeding.
What paints are best for plastic laptop shells?
Use paints rated for plastics or coatings designed for non-porous surfaces. Test a patch first to ensure adhesion and avoid damage.
Choose plastic-safe paints and test before applying.
How long does curing take?
Curing times vary by product; expect several hours to a couple of days for full hardness. Do not handle until fully cured.
Cure times vary; wait until fully hard before use.
Is there a safer alternative to painting the laptop?
Yes, vinyl wraps or skins are safer and reversible, offering style without risking internal components or warranties.
Wraps are safer and reversible options.
Will painting cause overheating?
If you avoid vents and ensure air intake areas remain uncovered, painting should not cause overheating. Do not cover cooling fins.
As long as vents stay clear, overheating is unlikely.
Watch Video
Quick Summary
- Plan design before buying materials
- Mask all sensitive areas to protect internals
- Thin coats yield better results than heavy layers
- Cure fully before handling to avoid damage
- Consider safer alternatives like wraps when in doubt