Can Acrylic Paint Be Used Outdoors? A Practical Guide
Learn whether can acrylic paint be used outdoors, with guidance on exterior paints, surface prep, primers, sealing, and maintenance for wood, metal, and masonry surfaces.

You can use acrylic paint outdoors when you choose exterior-grade formulas and follow proper prep. Exterior-grade acrylics, surface prep, and weather-aware application are essential to prevent fading, cracking, or peeling. The key is selecting outdoor-rated paints and sealing for durability. If you start with interior-only paint, you may see faster weathering. Always verify exterior use and UV protection on the label.
Can Acrylic Paint Be Used Outdoors? Key Facts and Definitions\n\nThe question can acrylic paint be used outdoors has a practical answer: yes, but only if you use paints labeled for exterior use and follow surface preparation and sealing steps. In this guide, we’ll walk through types, surfaces, and conditions that influence outdoor durability, drawing on PaintQuickGuide's analysis. Exterior-grade acrylic paints form a flexible film that resists moisture better than interior formulas, yet exposure to sun and rain still demands proper prep and protection. Some surfaces require primers, some require crack repairs; the combination determines longevity. According to PaintQuickGuide, starting with the right materials and a clear plan makes a big difference.
How to Choose Outdoor-Grade Acrylic Paint\n\nLook for paints labeled exterior or for outdoor use, with built-in UV protection and weather resistance. Water-based acrylics labeled as exterior typically offer superior adhesion to most substrates when compared to interior products. Consider the surface you’ll paint—wood, metal, masonry, plastic—then confirm compatibility with primers and sealers. Check the label for cure times, number of coats recommended, and any surface-prep notes. According to PaintQuickGuide analysis, combining a high-quality primer with exterior acrylic reduces peeling and helps maintain color vibrancy over time.
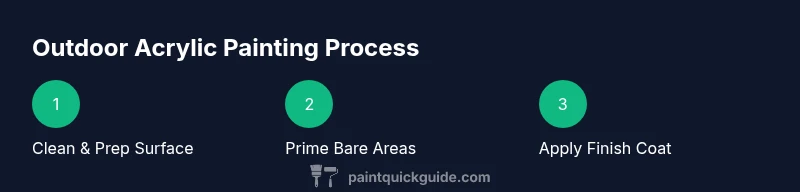
Surface Prep Essentials Before Painting Outdoors\n\nThorough surface prep is the backbone of outdoor performance. Begin by cleaning the surface to remove dirt, oils, and mildew. If you encounter peeling paint, scrape it away and sand the edges to smooth transitions. Repair any cracks or holes with suitable filler and allow it to cure fully before priming. A dry, dust-free surface ensures the primer can grip evenly, which reduces the risk of peeling down the line. As PaintQuickGuide notes, neglecting prep is the fastest path to early color fade and failure.
Primers, Priming, and Primer Alternatives for Exterior Surfaces\n\nPriming is often the missing step that makes outdoor acrylics last. Use exterior or bonding primers on bare wood, metal, or masonry to improve adhesion and block stains. On previously painted surfaces, a thin primer or deglosser can help the new coat adhere without sanding through existing layers. If you choose to skip primer, you may save time upfront but could face peeling, cracking, or uneven color, especially on porous or glossy surfaces. PaintQuickGuide emphasizes testing porosity with a small patch before a full coat.
Step-by-Step Outdoor Painting Techniques\n\nBegin with edge work to establish clean lines, then roll large flat areas with long, even strokes to avoid lap marks. Maintain a wet edge and work in manageable sections to prevent streaks. Apply a first coat thinly and evenly; allow sufficient drying time before applying a second coat. For textures or irregular substrates, use a brush for texture areas and a roller for smooth expanses. Finish with a light touch to blend edges and reduce brush marks. PaintQuickGuide reminds readers to follow label directions for cure times and recoat intervals.
Drying, Curing, and Weather Considerations\n\nDrying time depends on temperature, humidity, and airflow. Colder or humid conditions slow cure, while heat and direct sun can cause faster surface drying and potential cracking if coats are thick. Plan painting during mild, dry weather and avoid nights with high humidity. Even after the paint feels dry to the touch, full curing may take days and can be affected by rain or dew. UV exposure gradually fades color, so monitoring sun exposure helps determine optimal timing for final coats.
Finishing and Sealing for Longevity\n\nA UV-resistant topcoat or sealant can dramatically extend outdoor life by reducing color fade and moisture ingress. Choose a sealer compatible with the underlying acrylic paint and the substrate. Apply as directed after the final coat has cured, typically in a dry period with steady temperatures. Re-apply sealant every few years or as needed based on wear, weather exposure, and color retention. PaintQuickGuide notes that sealing is often worth the extra step on high-traffic or highly exposed surfaces.
Maintenance and Longevity for Outdoors\n\nRegular maintenance helps keep outdoor acrylic projects looking fresh. Inspect for peeling or dull spots after seasonal weather changes and touch up as needed. Clean surfaces periodically with a mild detergent to remove dirt and environmental residues that can degrade color over time. Repaint or reseal when the coating shows significant wear, typically after several seasons, depending on climate and exposure. PaintQuickGuide recommends tracking repaint intervals to preserve curb appeal.
Common Mistakes and How to Avoid Them\n\nCommon mistakes include choosing interior paint for exterior use, skipping priming, painting in unsuitable weather, and applying thick coats. These errors lead to poor adhesion and rapid deterioration. Another frequent pitfall is ignoring surface repairs, which creates weak points where peeling begins. To avoid these issues, verify exterior labeling, prime properly, and follow recommended cure times and recoat intervals.
Outdoor Painting on Different Materials\n\nWood, metal, and masonry each require tailored approaches. Wood generally benefits from a bonding primer and lighter coats; metal often needs rust-inhibiting primers; masonry surfaces may require a masonry-specific primer and a breathable finish. Always check product compatibility with the substrate and use the appropriate primer or sealer. When in doubt, test a small patch on your chosen material before committing to the full project.
Tools & Materials
- Exterior-grade acrylic paint(Choose products labeled for exterior use with UV protection)
- Primer (exterior or bonding primer)(Use on bare wood, metal, or masonry; compatible with acrylics)
- Degreaser or mild detergent(For cleaning dirt, oils, and mildew)
- Sandpaper (120-220 grit)(Smooth surfaces after cleaning and repair)
- Painter's tape(Mask edges and trim to keep lines clean)
- Drop cloths or plastic sheeting(Protect surrounding areas from spills)
- Synthetic-bristle brushes and/or rollers(Use appropriate nap for surface texture)
- Tray and extension pole (optional)(For easier large-surface coverage)
- Exterior topcoat/sealant (UV resistant)(Protects against fading and moisture)
- Safety gear (gloves, goggles)(Protect skin and eyes during prep and painting)
- Ladder or step stool(Access high areas safely)
Steps
Estimated time: 4-10 hours active, plus 24-48 hours curing
- 1
Clean the surface
Remove dirt, grease, and loose paint. Wash with a mild detergent, rinse thoroughly, and let the surface dry completely before proceeding.
Tip: A dry surface ensures primer adheres evenly. - 2
Repair surface defects
Fill cracks or holes with a compatible filler, then sand smooth once dry. Repairing damage prevents telegraphing through the finish.
Tip: Match filler to substrate for best results. - 3
Sand glossy areas
Lightly sand glossy or slick areas to improve adhesion, then wipe away dust with a tack cloth.
Tip: Use 180–220 grit for a gentle abrasive finish. - 4
Prime bare surfaces
Apply an exterior or bonding primer on bare wood, metal, or masonry to ensure adhesion and stain-blocking.
Tip: Prime thinly and evenly; avoid heavy coats that obscure texture. - 5
Cut in edges
Use a brush to seal edges and corners before rolling, ensuring a clean outline.
Tip: Maintain a wet edge to prevent lap marks. - 6
Apply first coat
Roll or brush in long, smooth strokes, working from top to bottom in manageable sections.
Tip: Apply a light coat first to improve color evenness. - 7
Dry and inspect first coat
Allow the first coat to dry per label instructions, then inspect for thin areas or missed spots.
Tip: A well-dried base helps achieve uniform color in the second coat. - 8
Apply second coat and seal
Apply a second coat for full coverage and color depth, then finish with an exterior sealant after curing.
Tip: Seal after the final coat has cured to maximize protection.
Your Questions Answered
Can I use interior acrylic paint outdoors?
Interior acrylic paint is not designed for long outdoor exposure and may fade, peel, or crack. Use paints labeled for exterior use for durability.
Interior acrylic paint isn't ideal for outdoor use and may fail sooner than exterior formulas.
Do I need primer for exterior painting?
Yes. Primer improves adhesion, blocks stains, and helps color uniformity, especially on bare wood, metal, or masonry.
Primer helps paint stick and last longer on outdoor surfaces.
Will outdoor acrylic paint crack in cold weather?
Extreme temperature shifts can cause cracking if coats are too thick or if the paint is not flexible enough. Use a flexible exterior formula and proper curing.
Cold weather can cause cracking if you don't use flexible exterior paint and proper curing.
How long does outdoor acrylic paint last?
Durability varies with product quality, surface, and climate. With proper prep and a sealant, outdoor acrylics can last several years.
With proper prep and sealing, outdoor acrylics can last for years.
Can acrylic paint be used on metal or masonry outdoors?
Yes, with the right primer. Metal benefits from rust-inhibiting primer; masonry may require masonry primer and sealing.
Yes, but use the right primers for metal or masonry.
What role do topcoats play in outdoor durability?
A UV-protective topcoat reduces fading and moisture intrusion, extending the life of the paint finish.
Topcoats help protect the finish from sun and moisture.
Watch Video
Quick Summary
- Verify you’re using exterior-grade acrylics.
- Prepare surfaces thoroughly before painting outdoors.
- Follow proper primer, coat, and cure times for best durability.
- Seal and maintain to protect against UV and moisture.