What to Do Corpse Paint With: A Practical Guide for Newbies
Learn how to apply corpse paint with confidence. This practical guide covers skin prep, color palettes, tools, step-by-step application, and removal tips, by PaintQuickGuide.

With corpse paint, you’ll start with a pale base, layer dark shadows for sunken features, and add textures for a rotted look. Prep skin, test products for allergies, and seal with setting powder. Gather the basics: white base, black shadows, brushes, sponges, and remover. Then follow a simple 3-phase outline: base, contour, texture.
What corpse paint is and why people use it
Corpse paint is a theatrical makeup style used in horror, cosplay, and film to simulate decay and hollowed features. It blends pale base colors with stark contrasts to create a chilling, otherworldly look. For many enthusiasts, the question of what to do corpse paint with is about achieving longevity and comfort during wear. According to PaintQuickGuide, planning your palette before mixing saves time and reduces waste.
Safety and skin care considerations
Always patch-test products on the jawline or behind the ear 24 hours before full application. Use skin-safe, fragrance-free products if you have sensitive skin. Prolonged wear can irritate; give your skin breaks between applications and remove makeup thoroughly to prevent pore clogging. If irritation occurs, discontinue use and consult a dermatologist.
Tools and materials for corpse paint
A reliable set of tools helps you apply corpse paint cleanly. Start with a pale base layer, then build shadows and textures. Basic items include a white base, black shadow products, and a few brushes. For best results, keep your kit compact and washable, and label each product to avoid mix-ups. This section prepares you for the hands-on steps that follow.
Base design and color choices
Choose a high-contrast palette: a bright white base with deep black or charcoal shadows. Add cold undertones like blue-gray in shaded areas to enhance depth. If you’re new, start with a classic skeletal look and gradually experiment with extra textures like greenish rot tones for a more ghastly effect. Always test colors on a hidden area to ensure they read correctly on camera.
Texture effects and aging details
Texture is key to convincing corpse paint. Use stippling for mottled skin, crack patterns with fine brushes, and light sponging to create rotted patches. Vary the opacity to mimic translucency and decay. Layering thin coats helps you avoid a chunky finish and maintains facial expressiveness for performances.
Layering, shading, and texture techniques
Apply shading in thin, controlled layers. Build from light to dark and blend edges softly to keep features readable. For teeth and gum lines, a touch of pink-gray can suggest decay without looking cartoonish. Always test under the lighting you’ll perform in to confirm contrast reads well.
Removal and aftercare
Careful removal is essential to protect the skin. Use a gentle makeup remover or micellar water, then cleanse with a mild cleanser and moisturize. If you’ve used heavy adhesives, follow with a soothing skin treatment and allow time to recover before wearing makeup again. Patch-testing after removal helps catch any delayed irritation.
Troubleshooting common issues and quick fixes
If colors stain the skin unevenly, wipe and reapply in light layers rather than trying to correct with heavy coats. For cracking or flaking, moisturize and re-set with a light powder. Avoid over-wetting the face during wear, which can cause smudging or running.
Quick reference: plan, apply, protect
This section summarizes the practical flow: plan your palette, apply base, build shadows, add textures, set the look, and remove safely. Keeping a tidy kit and staying mindful of skin health ensures a safer, more effective corpse paint experience.
Tools & Materials
- White base face paint (cream-based)(Opaque and non-toxic; choose a product that dries to a matte finish)
- Black face paint (cream-based)(For deep shadows and contour; avoid blue-toned blacks near under-eyes)
- Setting powder (translucent)(Lock in the base without adding color)
- Makeup sponges (latex-free)(Dampen slightly for smooth application)
- Fine detail brushes(For lines, cracks, and precise shading)
- Stippling sponge or brush(Creates texture for rotted patches)
- Makeup remover / micellar water(Safe removal at end of session)
- Primer or lightweight moisturizer(Protect skin and help makeup grip)
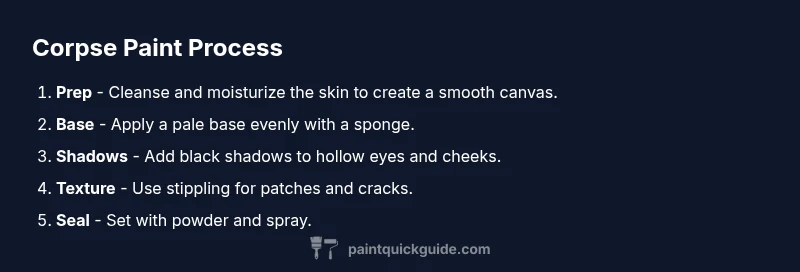
Steps
Estimated time: 60-90 minutes
- 1
Prepare skin
Cleanse and moisturize to create a smooth canvas. Allow moisturizer to fully absorb before makeup to prevent pilling.
Tip: Patch-test products on a small area before full application. - 2
Apply pale base
Spread an even white base with a damp sponge, building thin layers until opaque. Let each layer set briefly for a flawless read.
Tip: Use light, patting motions instead of rubbing. - 3
Define eye sockets and hollows
Dab black into eye sockets and along cheek hollows to create depth. Keep edges soft to avoid a harsh cartoon look.
Tip: Use reference images and mirror under your performance lighting. - 4
Shade nose and jaw
Shade the sides of the nose and jawline with gray-black tones to sculpt features. Blend outward to soften transitions.
Tip: Build color gradually; you can always add more. - 5
Create mouth and teeth effects
Paint subtle shading around lips; consider teeth lines with thin white highlights. Don’t overdo to keep readability.
Tip: Use a clean, fine brush for precise lines. - 6
Add texture and cracks
Dab stippling texture for decayed patches; draw fine cracks to imply age and damage without overpowering facial features.
Tip: Work in small sections to maintain control. - 7
Introduce color accents
Add cold bruising hues sparingly (blue-gray, purple) to enhance realism. Focus on areas that catch light.
Tip: Less is more; avoid muddying the base. - 8
Set the look
Lightly powder to set and finish with a setting spray if available. Check under stage lighting for balance.
Tip: Carry a travel-sized powder for touch-ups. - 9
Finalize and review
Take a final look in natural and artificial light. Adjust shadows and textures as needed for clarity.
Tip: Record a quick test shot to verify camera read.
Your Questions Answered
Is corpse paint suitable for all skin types?
Most people can wear corpse paint, but sensitive or reactive skin benefits from a patch test and fragrance-free products. If irritation occurs, stop and consult a dermatologist.
Patch test first; if irritation happens, stop and consult a dermatologist.
Can I use regular makeup for corpse paint?
You can use non-toxic stage makeup, but professional corpse paint products often offer better longevity and opacity. Always confirm skin safety on a hidden area.
You can use stage makeup, but test first and choose safe products.
How long does corpse paint last?
Durability depends on products and setting. Expect several hours with proper setting powder and a sealant spray; sweat can reduce longevity.
It lasts several hours with proper setting, but sweat can reduce longevity.
What’s the best way to remove corpse paint?
Use a gentle makeup remover or micellar water, then cleanse and moisturize. Avoid scrubbing to protect the skin.
Use makeup remover, then cleanse and moisturize gently.
Do I need prosthetics for corpse paint?
No prosthetics are required; corpse paint focuses on makeup techniques. Prosthetics can enhance the effect but aren’t necessary for a basic look.
Prosthetics aren’t required unless you want extra depth.
Are there safety considerations for eye makeup?
Avoid applying heavy products directly into the eye. Use hypoallergenic products near the eye area and consider protective lenses if required.
Be cautious around the eyes and use safe products.
Watch Video
Quick Summary
- Plan your palette before applying.
- Build from base to detail in thin layers.
- Test skin safety with patch tests.
- Remove makeup gently and moisturize afterward.