Halloween Pumpkin Ideas with Paint: Creative DIY Pumpkins
Explore practical, paint-based Halloween pumpkin ideas with step-by-step techniques, safety tips, and cost estimates to help homeowners and DIY enthusiasts create durable, festive pumpkins.

With these halloween pumpkin ideas with paint, you’ll learn simple, creative ways to transform ordinary pumpkins into eye-catching Halloween decorations. This guide covers practical painting techniques, color schemes, and step-by-step instructions for beginners and DIYers. You’ll also get safety tips, material lists, and cost estimates to plan a budget-friendly, festive display.
Why Halloween pumpkin ideas with paint matter
Painted pumpkins offer a versatile, low-waste alternative to traditional carving, giving you durable, reusable decor that lasts through several weeks of the season. From bold, graphic designs to delicate, hand-painted scenes, acrylic or latex paints let you experiment with textures, shading, and layering techniques that carving simply can’t achieve. For homeowners, DIY enthusiasts, and auto refinishing hobbyists, painted pumpkins provide a creative outlet that fits any skill level and budget, while reducing the risk of decay.
According to PaintQuickGuide, painted pumpkins combine seasonal whimsy with lasting color protection, making them a practical alternative to carved pumpkins that rot. A well-executed paint design can survive light rain and UV exposure when sealed properly, making your display more durable for porch decorations, indoor mantle displays, and even table centerpieces. This article focuses on safe, water-based paints and clear sealants that keep pumpkin surfaces intact while preserving their natural texture. By choosing non-toxic, washable paints and proper sealing, you’ll extend the life of your pumpkins and minimize cleanup headaches later.
If you’re just starting, begin with simple shapes and bold palettes to build confidence. For more intricate designs, practice on a few fake pumpkins or gourds first, then transfer your favorite motifs to real pumpkins. Planning ahead—selecting a theme, gathering paints, and estimating curing time—helps you avoid last-minute stress and ensures your pumpkins look polished for Halloween parties and porch displays. PaintQuickGuide’s team emphasizes safety, patience, and purposeful color choices as the core of a successful paint project.
Tools, materials, and safety basics
To achieve clean, consistent results, assemble a core set of tools and materials before you start. Your kit should include high-quality, water-based paints (acrylic or latex), a small selection of brushes (fine detail brushes for lines, medium brushes for blocks), painter’s tape for sharp edges, a soft cloth for cleanups, and several sealants or topcoats designed for outdoor use. A spray sealant can offer even coverage, but apply it in a well-ventilated area and protect surrounding surfaces.
Before you begin painting, prepare the pumpkin surface: wipe away dirt with a damp cloth, allow the pumpkin to dry completely, and remove any blemishes with a light sanding if needed. If you’re using acrylic paints, avoid heavy layering that can crack as the pumpkin shrinks. Instead, apply thin, even coats and allow each layer to dry fully before adding the next. Sealants should be chosen based on whether your pumpkin will be displayed indoors or outdoors and whether you want a matte, satin, or glossy finish. For outdoor displays, consider products labeled as weather-resistant or UV-rated.
Safety is essential when working with pumpkins, especially for kids. Wear gloves if you’re applying sealants, work in a ventilated space, and keep paints away from food-contact surfaces. If you’re painting multiple pumpkins, organize your design plan on paper first to minimize brush changes and keep color choices cohesive. By following these steps, you’ll create a durable project that cleanly expresses your Halloween theme without sacrificing safety.
Design ideas by theme and skill level
Whether you’re a beginner or an experienced painter, a clear theme helps you choose colors, textures, and finishes. Here are beginner, intermediate, and advanced ideas you can try this season. For beginners, opt for bold shapes and high-contrast palettes—think classic jack-o’-lantern faces, polka dots, or simple stripes. Intermediate designers can explore gradient shading, stenciling, or faux textures (like wood grain or stone) to add depth. Advanced painters might create intricate scenes, detailed portraits, or seasonal motifs like owls, bats, or haunted houses with multiple color layers.
- Beginner: One-color pumpkins with a black or white design using clean edges and solid fills. Simple motifs like moons, stars, or a single ghost can be immediately recognizable and quick to finish.
- Intermediate: Use gradient or ombre effects, add shading to faces for three-dimensional appearances, and combine two to three colors for a cohesive look.
- Advanced: Create narrative scenes (a haunted landscape, a pumpkin family) or replicate textures (zinc, copper patina) with layered glazes and fine detailing.
If you’re decorating with kids, choose designs that are easily replicated and forgiving of small mistakes. You can also create a “design station” with color swatches and trial shapes so the family can participate together. The key is to balance ambition with practicality: ambitious designs raise the wow factor; practical designs ensure you actually finish them before they rot.
For inspiration, browse gallery ideas from artists and DIY bloggers. Keep a few backup pumpkins on hand in case a few surfaces don’t take paint well or textures wear unevenly. With a thoughtful approach, your halloween pumpkin ideas with paint will become memorable seasonal displays rather than simple decorations.
Step-by-step painting workflow: from base to finish
A clear workflow helps you stay organized and produce consistent results. Start with a clean, dry pumpkin, then apply a base coat that provides a uniform surface for your design. Once the base is dry, sketch your motif lightly with pencil or chalk, then fill in large shapes with flat color. Build layers gradually: add mid-tones and shadows to create depth, then apply fine details for texture and character. Finally, seal the design with a weather-resistant topcoat if the pumpkins will be displayed outdoors.
Begin with a moisture-free surface: wipe down the pumpkin, then let it air dry completely. Base coats should be relatively thin; multiple translucent layers often look better than a single heavy layer. When you’re ready to detail, use small brushes for precision, and consider using masking fluid or painter’s tape for clean lines. After painting, and before sealing, allow ample drying time in a dust-free area. If you notice smudges, lightly correct them with the appropriate color and re-dry.
Pro tips for a durable finish: apply the sealant in thin, even coats, and avoid basking the pumpkin in direct sunlight while the topcoat cures. If you’re painting pumpkins for outdoor display, reapply sealant as needed to maintain color and prevent cracking due to temperature fluctuations. With careful layering and proper curing, your pumpkin designs will maintain their vibrancy through the Halloween season and beyond.
Color palettes and finishing touches for Halloween aesthetics
Color selection sets the tone for your pumpkin display. Classic orange pumpkins pairs well with black and white for high-contrast designs, while metallic accents (copper, gold, silver) can elevate the look to something more sophisticated. For a spooky vibe, use deep purples, midnight blues, and charcoal grays with eerie white highlights. If you want a playful display, try candy-corn inspired triads (orange, white, and yellow) or pastel Halloween palettes with lilac, mint, and peach tones.
Finish options influence mood and longevity. A matte finish is soft and modern, while satin offers a gentle sheen that catches light without glare. Glossy finishes read as festive and vibrant but may show brush marks more easily. Consider combining finishes in a single pumpkin for visual interest—matte base with glossy accents often works well. For outdoor pumpkins, choose weather-resistant sealants and store extra tops for quick maintenance if a pumpkin begins to degrade.
Textural ideas add depth without complexity. Use sponges or rags to dab color for stippled textures, or a fine brush to create subtle fur, scales, or fabric looks. Practice textures on a spare surface first to refine technique. With deliberate palettes and careful finishing, your halloween pumpkin ideas with paint will stand out, whether displayed on a porch or used as a centerpiece indoors.
Budgeting, timing, and longevity: planning smart decorations
Budget-conscious planning helps you maximize impact without overspending. Basic designs usually cost less per pumpkin, especially if you reuse paints you already own. A simple solid color or two-tone motif can be achieved with a modest palette, while more elaborate scenes require additional colors and finer brushes. If you plan to display pumpkins outdoors, factor in sealants and the potential need for re-application as weather changes over the season.
Timing matters: start early to let each layer dry fully, especially when layering shading or fine details. If you’re painting many pumpkins, batch the process across a few days to prevent fatigue and ensure consistent finishes. For events or parties, build a few extra pumpkins to accommodate last-minute display needs.
Paint-based decorations can be economical, but costs vary with design complexity. General rules of thumb suggest more complex motifs increase materials and time, while simpler designs save money and effort. To stay within budget, consider using limited color palettes and reusable stencils. Remember to account for drying time and storage needs after the season ends. The right balance of color, finish, and care will yield a compelling Halloween display that remains vibrant through the weeks ahead.
Tools & Materials
- Acrylic or latex craft paints (assorted colors)(Choose non-toxic, water-based paints safe for pumpkins; set aside a dedicated palette for each pumpkin to avoid cross-contamination)
- Brushes (fine detail + medium flat brushes)(Include at least two small detailing brushes (0.5–1 cm) and one larger brush for fills)
- Painter’s tape and graphite transfer paper(Tape helps achieve sharp edges; transfer paper can help with precise designs)
- Soft cloths or sponges(For cleaning surfaces and distressing textures)
- Clear sealant (matte or satin, weather-rated for outdoors)(Choose a sealant compatible with your paint type and intended display location)
- Gloves and ventilation(Keep workspace well-ventilated; wear gloves when applying sealants)
- Disposable drop cloths or newspaper(Protect surfaces during painting and sealing)
- Fake or extra pumpkins for practice(Practice on cheaper gourds before painting real pumpkins)
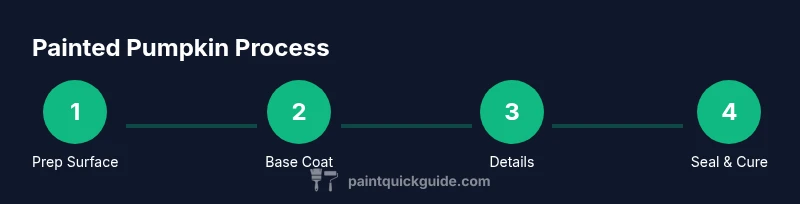
Steps
Estimated time: 60-120 minutes
- 1
Prepare the pumpkin surface
Wipe the pumpkin with a damp cloth to remove dirt. Allow to dry completely, then lightly sand any rough areas to create a smooth painting surface. This ensures paint adheres evenly and reduces texture pulling.
Tip: Drying time is critical; work in a dust-free area to avoid specks sticking to the surface. - 2
Apply a base coat
Choose a base color that sets the mood for your design and apply thin, even coats. Let each coat fully dry before applying the next one to prevent peeling and cracking.
Tip: Use a foam brush for a smooth, uniform finish and minimize brush marks. - 3
Sketch your design
Lightly sketch your motif with a pencil or chalk on the pumpkin. This helps guide color placement and balance.
Tip: Keep lines light; you can erase or brush away chalk as you paint. - 4
Paint core shapes first
Fill in the largest color areas first, building toward details. Allow each color to dry before layering over it to prevent bleeding.
Tip: Work in sections to maintain control and avoid smudges. - 5
Add details and texture
Add shading, highlights, and texture using smaller brushes. Build depth with subtle transitions between colors.
Tip: Use a dry brush technique or light tapping for texture without over-saturating the surface. - 6
Seal and cure
Apply a compatible sealant in thin, even coats. Allow sufficient cure time in a vented space before handling or displaying outdoors.
Tip: Apply 2–3 light coats rather than a single heavy coat for durability.
Your Questions Answered
What paints are safest for painting real pumpkins?
Use water-based acrylic or latex paints that are non-toxic and designed for crafts. Always check the label for safety notes and ventilation recommendations when applying sealants.
Use water-based paints labeled non-toxic and craft-safe, and ventilate well when applying sealants.
Will painted pumpkins last outdoors?
Yes, with a weather-rated sealant and thin paint layers, painted pumpkins can last several weeks outdoors. Reapply sealant as weather changes to maintain color and finish.
Outdoor durability is good with a proper sealant; reapply as needed for longevity.
How many colors should I start with for a simple design?
Begin with 2–4 colors for a simple design, then add more as you gain confidence. Keep color harmony in mind to ensure the design reads clearly from a distance.
Start with 2–4 colors and expand as you get comfortable.
Can I reuse pumpkins from year to year?
Carved pumpkins don’t hold up across seasons, but painted pumpkins can be reused if stored properly and kept in a cool, dry place. Consider sealing pumpkins with decorative finishes that resist wear.
Painted pumpkins can be reused if stored well and protected from moisture.
What is the best finish for a Halloween pumpkin indoors?
A satin or matte sealant works well indoors, providing a subtle sheen and protection without glare. Avoid heavy gloss indoors to prevent fingerprint marks.
Satin or matte sealant is ideal for indoor pumpkins.
How long does it take to complete a mid-level pumpkin design?
A mid-level design typically takes 60–90 minutes per pumpkin, depending on detail and drying times between layers.
Expect about 1–1.5 hours per pumpkin for mid-level designs.
Watch Video
Quick Summary
- Plan with a clear theme to guide color choices.
- Use thin layers and proper drying to prevent cracking.
- Sealants extend display life, especially outdoors.
- Test designs first on practice pumpkins.
- Balance creativity with achievable technique for best results.